Tanpura construction 5
The next stage in the building of a tanpura is the placing of decorative inlay and wood carvings. The style of decoration is entirely dependent on the makers choice, but it is generally found to be along with traditional designs. A few makers have a very distinctive style of decorating their instruments so that they can be easily identified, although copies are very common. Some instruments are extremely simple in decoration and others have highly intricate designs. However, decoration is not a factor for determining a good instrument.
Nowadays Japanese celluloid replaces the older ivory. The edgings and inlays are cut and glued or sometimes pinned with bamboo nails into place. Into the celluloid, a pattern is scratched and then filled with black and/or red wax. Along with the edgings, the deeper areas are also filled with wax or glue. Curved to fit the shape of the tumba, wooden carved leaves called patti are glued and pinned with bamboo nails onto the tumba. Their function is mainly decorative, although they do cover up any irregularities in the shape of the gourd.
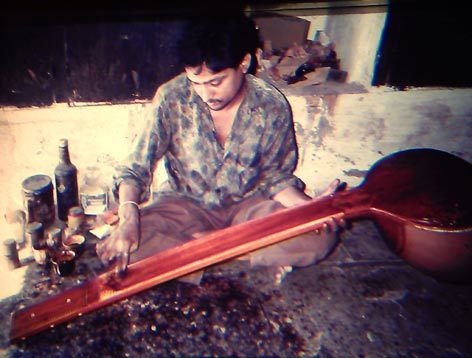
The instrument is now ready for finishing. The wood is finely sanded and any dents, holes or irregularities are filled with a substance called saras. This consists of clean, fine wood dust, mixed with gum. The substance is soaked and cooked in water which dissolves the gum. The remaining paste should be applied a little warm and allowed 24 hours to dry. There is also a readily available substance manufactured in Madras which is made from hide.
Polishing the clean sanded instrument is an art in itself. Shellac is carefully prepared with alcohol and applied with a small piece of cotton cloth. The first layer which is applied sometimes has a touch of turmeric added, to enhance the wood with a rich golden tint. The shellac coats not only all the wood but also the decorative celluloid; this is later removed with a knife. The patterns which are etched into the celluloid stay intact. Fine sanding between coats ensures a good smooth touch. The final result is achieved after many layers of shellac are applied and left for a couple of weeks to dry.

